Product - Pricing
Resources Partnership Contact
Setup Guide: iiYama Display with Android TV Box as Digital Signage Player
Martin Pavlik , 7/3/2020
Learn how to easily connect your iiYama display with a ScreenManager Player in just 5 minutes for the best 24/7 digital signage experience.

Requirements
- iiYama Display: Ensure you have the iiYama display ready.
- ScreenManager Media Player or any other Android Media Player
- You can also use any other Android Media Player, but make sure that the HDMI CEC is enabled in the System Settings.
- HDMI Cable: A standard HDMI cable for connections.
- Time: Set aside approximately 5 minutes for this setup.
Setup Steps
Prepare the iiYama Display:
- Follow the user manual provided with your iiYama display to set it up. This includes assembling the stand (if needed), connecting the power cable, and other preliminary steps.
- Familiarize yourself with the remote control functionalities as you will need it for navigating through the settings.
Connecting the Devices:
- Use the HDMI cable to connect the ScreenManager Media Player to the iiYama display. Ensure the cable is securely connected to the HDMI ports of both devices.
Accessing Advanced Settings:
- Turn on the iiYama display.
- Press the HOME button on the remote control.
- Navigate to the “Advanced settings” option in the menu.
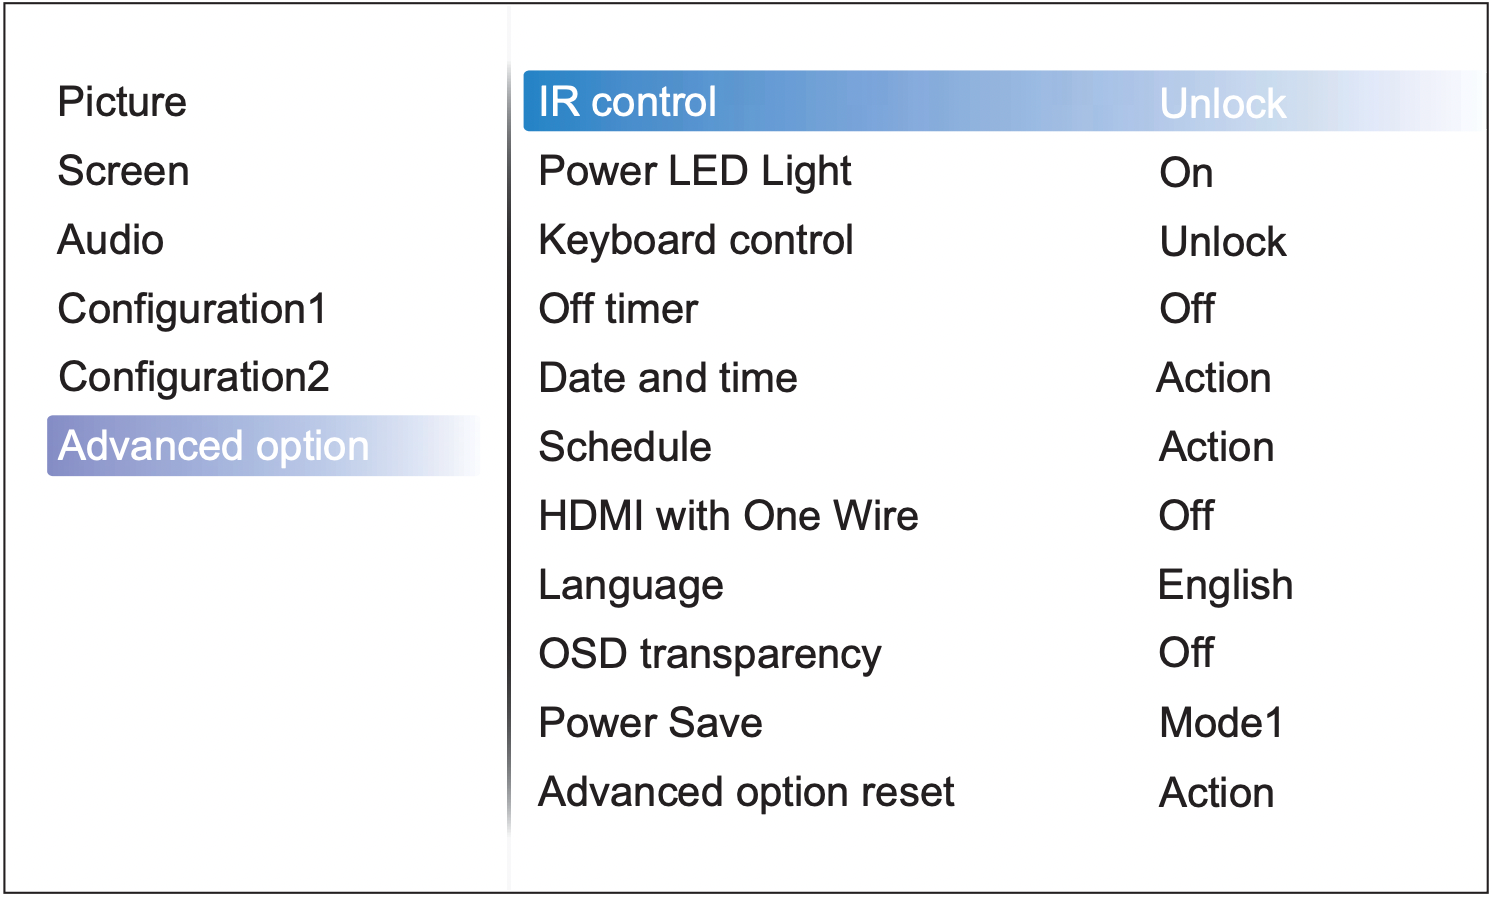
Enabling HDMI with One Wire:
- In the Advanced settings, find and set the "HDMI with One Wire" setting to "On".
- This feature allows the iiYama display to be controlled by the ScreenManager Media Player via HDMI, enabling remote scheduling of the display's operating times.
Setting Power Save Mode:
- Still in the Advanced settings, set the "Power Save" option to "Mode 3".
- This mode ensures the display automatically turns on when it detects an HDMI signal, which is useful for seamless operation.
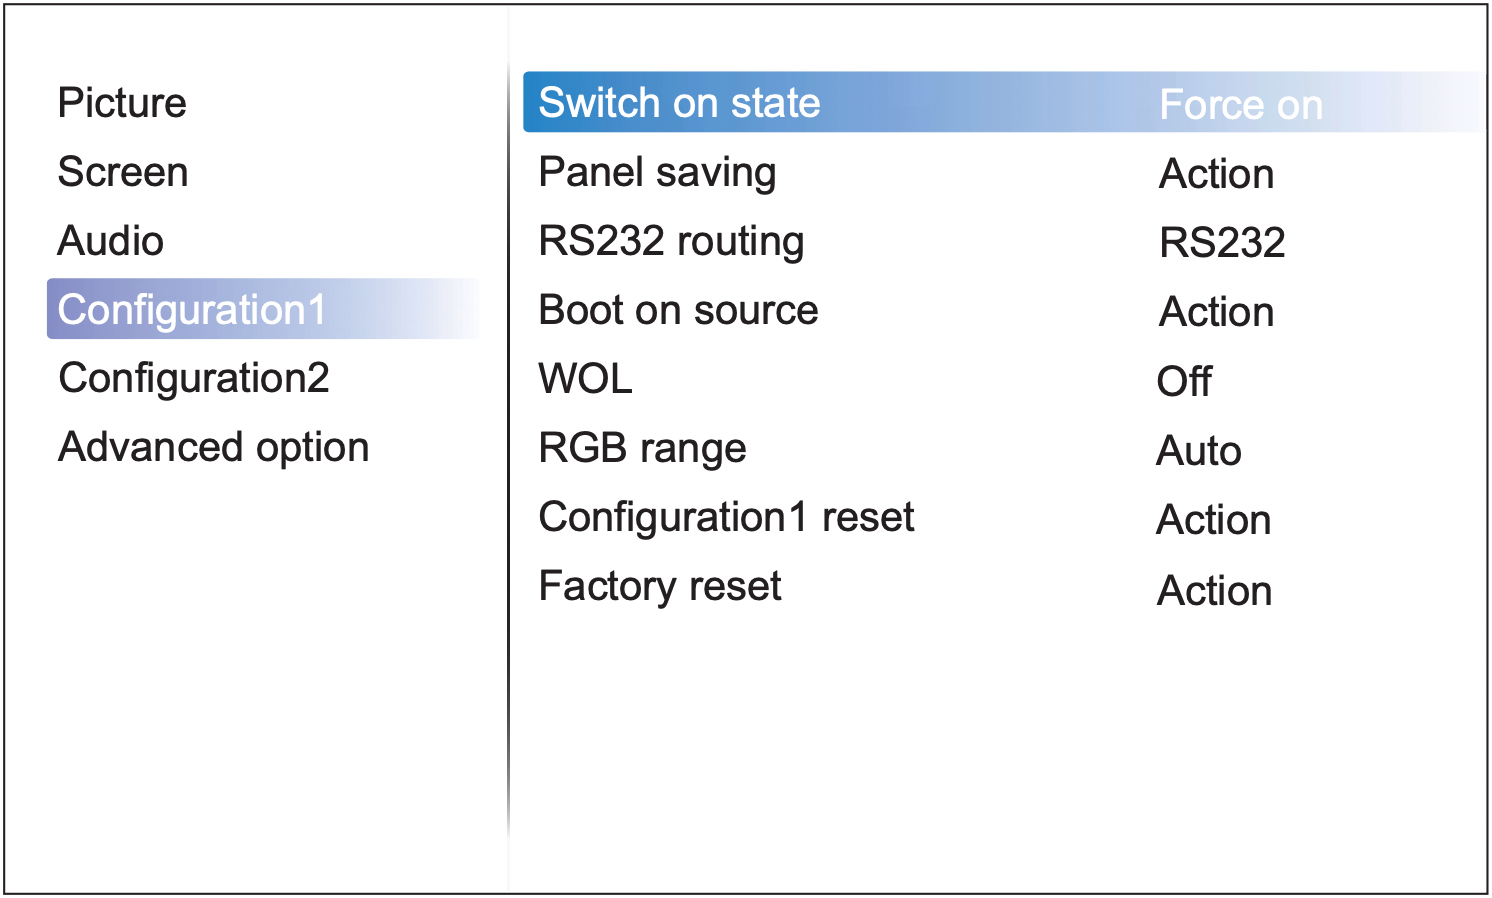
Configuring Boot Source:
- Navigate to the "Configuration 1" section within the settings menu.
- Set the "Boot on source" option to "HDMI 1". This ensures that every time the display is turned on, it automatically selects HDMI 1 as the source, which should be connected to your ScreenManager Media Player.
Finalizing Setup
- Once all settings are correctly configured, the iiYama display should now be ready to use with the ScreenManager Media Player for 24/7 operation.
- Test the setup by turning off and then turning on the display to check if it automatically selects the correct HDMI source and displays content from the ScreenManager Media Player.
Troubleshooting
- If the display does not automatically select the correct HDMI source, double-check the 'Boot on source' settings.
- Ensure that the HDMI cable is properly connected if there is no signal.
This setup should ideally take about 5 minutes and will allow for efficient and remote management of your iiYama digital signage display using the ScreenManager Media Player.
Ready to get started?
We offer a free 14-day trial, no credit card required.
Related Posts
Turn Your Android TV or Box into a Digital Signage Player
There is no need to invest tens to hundreds of thousands into expensive Digital Signage systems; you only need an Android TV or Android TV Box itself and any TV or monitor with an HDMI port.

Massive Deployments of Android Digital Signage Players Made Easy
Discover how ScreenManager excels in managing massive deployments of Android digital signage players, offering advanced control and seamless operation.

Digital Menus Reimagined: A Retail Food Success Story
When digital displays meet ingenuity: Dive into a store's transformative journey for better customer experiences.
- [email protected]
- +420 604 487 886 (WhatsApp)
VAT: CZ08543682
Kurzova 2222/16 155 00
Prague, European Union